No products in the cart.
Finding Sound Leaks – The Ultimate Guide

20
Jan
Often times residents know that there is a sound-leak in their room – but that’s only the first step. Next, you need to pinpoint the sound leak in order to fix it. When trying to find sound leaks, there are a number of rules of thumb to follow.
Just like inspecting a house prior to purchase, you should walk around your living space, looking at all edges, and inspecting all openings and passageways. Take your time to be sure you do not overlook any leaks. Also, limit your search to rooms that require better noise insulation – this will reduce the time needed to perform the soundproofing walk-down. Check in this order to determine where most of the noise can be eliminated.
Using the Right Tools to Find Sound Leaks – How to Find Where Noise is Coming From
Before taking the time looking for sound leaks, be sure you have the right equipment on hand to located them. You can usually tell where sound leaks are because the noise coming into your space is going to be the loudest in that spot. There are a few ways that you can determine that more noise is leaking in through one spot compared to any others.
First, you can just listen at different spots to see if you can hear a difference in the amount of sound coming in. This isn’t very reliable, but if you’re just doing it for a home project, it’ll suffice. If you want more accurate results with some real life sound level readings, buy a simple SPL Meter and you’ll be able to tell pretty much the exact difference in the amount of sound leaking in through different spots.
NOTE: Don’t trust sound level readings on phone apps, phones aren’t able to accurately measure decibel levels.
The Ultimate Guide – The 6 Best Ways to Find Sound Leaks
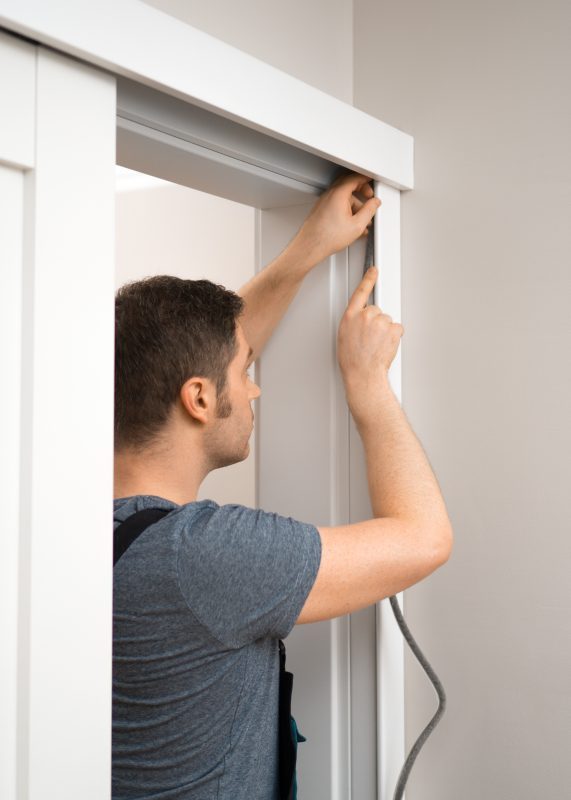
1. Finding Sound Leaks Around Doorways
Many doors are hollow-core, which allow significantly more sound to pass through. You can detect these by their lighter weight, and by knocking on them to hear whether they resonate (a solid-core door will sound “fuller”). Manufacturers make them like this to save weight and cost. Next, check the gaps at the door threshold, especially in older homes. If the gap is significant, use a door sealing kit.
For those who have a hollow-core door, you could install a new composite or solid-core door to reduce the noise passing through it, or you could just add another layer onto the door. If you need to reduce noise passing through on a budget, or do not wish to make structural modifications, the AcoustiDoor is a good choice for you.
2. Find Sound Leaks Trough Windows
Is the window single-pane, double-pane, or a customized window? A second pane is instrumental in reducing noise transfer through the window, but this can often be offset by not having proper seals around the window. Check around the edges for any air flow, which may be repaired with caulk or re-sealed per the window specs.
If the issue is the glass being too thin, you can add a second pane with space in-between as a “deadened air space”. You can also add an acoustical curtain in front of the window to solve either issue – adding noise insulating mass, or shoring up leaks around the window’s edge.
Blog: Soundproof Your Windows From Traffic Noise
3. Noisy Air Ducts and Returns Can Be a Sign of a Sound Leak
This is a common cause for sound leaking between rooms. While the air ducts and returns help to keep your home at your ideal temperature, sound is able to travel through the large vents. Unfortunately, filters and grates will not diminish the sound transmission. Stand next to the opening, and listen for sounds that are distracting. Can you hear the TV from the other room, or maybe cars driving outside? You can also use an inexpensive decibel meter to find sound leaks. Just make sure the one you purchase goes low enough to detect the sound bothering you.
Sometimes you can close these off manually, while other times you will need to order a custom curtain to seal it off. Remember to leave at least one return open to allow airflow, and contact an HVAC or Acoustical Consultant if you do not want to modify it yourself.
4.Find Sound Leaking Past Gaskets and Seals
Find and seal sound leaks around doorways. Door sweeps and seal are an affordable and effective solution at sealing sound leaks around doors.
The gaskets and seals around any of the fixtures in the wall are designed to reduce the amount of noise passing through. However, some will break down over time, or were damaged during installation. Check the integrity of each seal with 2 tests.
First, and a personal favorite, is to perform a light test. Turn off all lights in the room and shield it from any incident light. Inspect the seal from the inside to determine if there is any light leaking through – if so, sound will be leaking through as well. Note: you can perform this test from the outside as well, by turning on internal lights and inspecting at night.
Second, you can use a paper test. Slide a piece of paper under the edge of the seal. If the seal is firm, it should hold itself up, and you should be able to dislodge it easily without having to pull hard.
5. Sound Passing through Walls
When inspecting walls, check that they are completely interconnected, and no spaces are left between perpendicular walls. With a space of just an inch, it will sound like the conversation next door is happening within your same room. If there is a drop ceiling, remove a panel and ensure that the wall extends all the way to the next floor. The ceiling panels will not block any sound passing through.
If there is a gap in the walls, this allows what we call ‘flanking’ in the soundproofing industry. This means the sound will pass through these gaps into any adjoining rooms.
Take a brief walk around the perimeter of the walls, looking for small holes, and checking that there is a good seal at the floor. Check for air movement along the floor as a sign that it is not properly sealed (blowing dust, etc.). To perform a full check, you may need to pull back the trim and look for missing caulk. If you find that there are no holes or gaps, the issue may simply be a lack of sufficient mass in the wall. Adding an extra layer of soundblocking drywall, or reinforcing with bulk mass-loaded vinyl will significantly reduce the noise passing through.
6. Sound Leaks in the Ceiling

Fixing sound leaks in a ceiling is probably going to require some construction. It may be necessary to add a layer of drywall to your ceiling in order to increase the mass and reduce some of the noise coming through.
To pick low-hanging fruit, seal common openings, and patch any larger holes with heavy gypsum board – more layers is better, and always seal with caulk.
Our List of Soundproofing SuppliesBe aware that concrete ceilings may share the same structure with the floor above, so noises will easily vibrate through them. If this is the case, you may need to hang an isolated ceiling with customizable hangers (typically neoprene) to create 2 truly separated surfaces. Likewise, you can create a floating floor if there is banging coming from below. Achieve this with neoprene or compressed glass fiber standoffs.
Review: Finding Sound Leaks
It is frustrating when there is noise getting into your room and you can’t find its source. It’s easy to do a quick walk-down and come up empty handed. That’s why there is a methodical process to find sound leaks, and by following our proven approach, you’re assured to minimize your expenses and time in solving your soundproofing problems.
- Check for sound flanking around the doorway – Use weather strips or a soundproof curtain
- Tackle the main source (windows) with fresh gaskets and acoustic caulk, or a soundproof curtain
- Adapt noisy air ducts and returns – make sure air is not whistling through any restricted pathways
- Secure all gaskets and seals around the interior of your home
- Soundproof your walls using electrical outlet putty pads, baseboard caulking, and sealing exterior returns
- Add acoustical insulation to the ceiling or upstairs floor for vibrational and airborne noise control
Thanks for reading! For more tips of finding sound leaks and fixing them check out our blog How to Soundproof Existing Windows.
Summary
Article Name
Finding Sound Leaks
Description
Finding sound leaks, or flanking paths, is the first step to determining adequate soundproofing solutions. See how to find and measure sound leaks here.
Author
Walker Peek
Publisher Name
Residential Acoustics
Publisher Logo

“Adding an extra layer of soundblocking drywall, or reinforcing with bulk mass-loaded vinyl will significantly reduce the noise passing through.”
Does your product work on walls? Most neighbors in our apartment complex complain about hearing noises through the shared wall between their bedroom and the bedroom of their neighbor. It is starting to make the place uninhabitable. We can’t sleep in our own bedroom.
Hey WC. The product would work on walls – that’s what the internal layer was initially designed for. However, it would probably not be the most cost effective way to soundproof. There are companies out there that sell Mass-Loaded Vinyl by the square foot (such as GLT), that could supply you with a lot more since there are no finishing layers or further modifications to the material. Thanks for the question.